Thursday, May 17, 2012

Quick Studio Tips That Everyone Should Know


Here are a few Tips and Tricks that can make your Heritage Studio experience even better and easier.

• When you first open a project, go to your page navigator on the right-hand side and double click on each page. Then go back to the page that you want to work on. This causes all of the pages to load up behind the scenes while you are working on your current page. Later, when you’re ready to click on a new page, it’s already loaded and ready to go.

• When placing a background or paper on your page, stretch it all the way past the gray outline of the canvas or page. This will ensure that there is plenty of room for the printer to crop.

• When placing text and images you don’t want cropped, keep them at least a half of an inch away from the gray border. In order to know exactly where a ½” in located on your page, click on the View button at the top left-hand side of your screen, scroll down to Rulers and Show Ruler. This will bring up a red grid. Each square on the grid represents ¼”. This is an easy way to make sure that everything is lined up or centered in your project.

• Once you are finished with an object (picture, text, etc.), instead of leaving it to the side of the page, delete it. This will allow your pages to load and preview faster. Use the delete key on your keyboard.

• If you’re having trouble getting some of your changes to save (like adding drop shadows or other effects), try moving the object slightly after making the change and before clicking Save or Preview. If the last change you make to your object is to move it, all of your other changes will be saved (even if you put the object right back in the same place). 

• Before you click the “Publish” button to complete your project, click Save and Quit, then open the project again. Click on each finished page and let it load one more time. This will ensure that all of your changes on each page have been saved.

• When previewing your project before publishing, be sure to check each page of the preview to make sure everything has loaded properly.

Tuesday, May 15, 2012

Available Craft Bucket Themes and Filling Ideas

Yesterday, I shared with you how to make the themed craft buckets. So to help you out a little bit more, I've listed some of the available bucket themes, Template ID#s and appropriate fillings* ideas below. Remember that these are only ideas and it's wonderful to think outside the box when it comes to bucket themes and gift ideas. I promise your family, friends, teachers and coaches will love everyone of these!

As a reminder, all of my templates can be found in the Template Gallery at www.luckygirlcreative.com or feel free to go to my Pinterest boards to see all of my designs at http://pinterest.com/luckygirlrox/
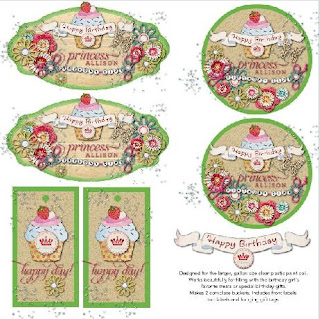
Girl Birthday Bucket (Appropriate for the Birthday Girl Princess)
          Template ID# 69139


·         Keep Calm, Teach On (An Everyday Survival Kit for Teachers)
o   Template ID#86179
o   Fill with a diet coke, chocolate candies, mints, gum, bandaids, aspirin, hand sanitizer, lozenges, immune system support tablets, thank you cards, white-out, erasers, #2 pencils, pencil sharpener, scissors, push pins, paper clips and tape.

·         Plant the Seeds (Appropriate for Teachers or Mothers)
o   Template ID#86176
o   Fill with gardening supplies such as gardening tools, gloves, seed packets such as Forget-Me-Nots, and a hand-decorated terracotta pot.
o   Or fill with flower themed goodies such as a notepad, notecards, pencils, socks, candles – anything decorated with a flower theme.

·         BBQ Bucket (Perfect for Father’s Day or a hostess gift at a backyard BBQ)
o   Template ID#69140
o   Fill with BBQ tools, napkins, plastic utensils, condiments, special BBQ sauces, oven mitt, seasoning spices, etc.

·         Girl Birthday Bucket (Appropriate for the Birthday Girl Princess)
o   Template ID#69139
o   Fill with any birthday present that will fit into the bucket. Make it extra girly to go along with the bucket label design. Can be a toy, candy, clothing or gift-cards to her favorite stores.

·         Kitty Cat Treat Bucket (For the cat lover)
o   Template ID#69138
o   Fill with cat treats, bouncy balls, catnip, feathered toys, cans of cat food, and so on.

·         What’s Cookin’ Bucket (From a Mom to a child or as a hostess gift)
o   Template ID#69137
o   Fill with kitchen gadgets, recipe cards, napkins, small baked goods, etc.

·         Thanksgiving Bucket (For the Christmas holiday)
o   Template ID#69136
o   Fill with coordinating colored paper products, salt and pepper shakers, candles, holiday cookie cutters, and small baked goods.

·         Holiday Junk Food Bucket (Christmas gift-giving)
o   Template ID#44281
o   Fill with an assortment of holiday themed candies wrapped in red and green wrappers.

·         Popcorn Bucket (Birthday present or teacher thank you)
o   Template ID#44280
o   Fill with bags of microwave popcorn, movie tickets, movie theater candy, popcorn-themed paper products.
o   Or fill directly with home-made popcorn in any flavor – butter, cheese, or plain. Or consider homemade Carmel corn which is perfect around the holidays.

·         Spa Day Bucket (For any woman needing a break from her everyday life)
o   Template ID#56431
o   Fill with bath products such as body lotion, perfume, soap, bubble bath, bath sponges, nail polish, make-up and so on.

·         Coach’s Junk Food Bucket (Baseball Coach)
o   Template ID#63511
o   Fill with treats for the coach or the team game snack. Could be bubble gum, peanuts, popcorn or other candy treats.

·         Basketball Coach Junk Bucket
o   Fill with your coach’s favorite treats. Perfect for a year-end gift from the team.
o   Template ID#63699

·         Football Coach Junk Bucket
o   Fill with your coach’s favorite treats. Perfect for a year-end gift from the team.
o   Template ID#63700

·         Wise Teacher Bucket
o   Template ID#86178
o   Fill with your teacher’s favorite goodies or treats.
o   Or have each of the kids in the classroom write letters of appreciation or draw pictures of themselves and the teacher. Place pink wrapped Hershey Kisses in the bottom of the bucket and add the letters telling the teacher “Whooo Loves Her”…

*My favorite place for finding bucket fillings are the Dollar Bins at Michael’s Craft store. They always have a great selection of several products that go together for a theme. They usually have a plentiful supply and are very inexpensive. 5-6 items usually fill up the bucket keeping the cost of the entire project at a minimum. Other place to find inexpensive bucket fillings are: the grocery store candy isle, the Dollar Store, Target Dollar Bins and Walmart.

Monday, May 14, 2012

How to Make Heritage Makers Craft Buckets

My new Craft Bucket Templates for Heritage Makers have been extremely popular and there are now so many themes to choose from. They are super simple, only take a few minutes to make, and everyone loves them!

But I do get the questions on how to make them, so I thought I'd share some simple instructions with you today.

      Plant the Seeds (Appropriate for Teachers or Mothers)
Template ID# 86176
How to Make the Buckets:

·         1. Search for your desired craft bucket template at www.luckygirlcreative.com. Once you are logged in, click on Template Gallery in the upper right-hand corner. Under Single Keyword Search, type in “Roxanne” and under the Show category, select 12x12 Scrap Page. Or you can find all my templates and corresponding Template ID #s at http://pinterest.com/luckygirlrox/ under My HM Craft Templates. Once you have found the desired template ID#, simply return to www.luckygirlcreative.com and type the ID# number directly into the Template Gallery single keyword search.

·         2. Get your template and personalize the template if desired. In most cases, no personalization is needed.

·         3. Publish and print the number of copies you need, remembering that each page makes two buckets. When you send the page to print, request UV coating at checkout to give the labels extra protection.

·         4. Purchase “gallon size” clear plastic buckets from Michael’s Craft store. Remember to always use the store coupons to save some extra money.

·         5. Cut out all pieces using sharp scissors or an Xacto knife for the straight edges. 

·         6. Using spray glue, scrapbooking adhesive roller or a glue stick, attach large labels to front of buckets and circles on the lid. My favorite spray glue is Scotch Super 77 Multi-purpose adhesive which can be purchased at most of the large crafting stores.

·         7. Punch holes in the gift tags as marked.

·         8. Using 5-6 inch lengths of ribbon, yarn, inch-wide fabric, or even colored curling ribbon, tie strips of fabric or ribbon onto the handle of the bucket for extra decoration.

·         9. Fill with your appropriate themed items. Have fun and be creative!
     Popcorn Bucket (Birthday present or teacher thank you)
Template ID#44280

       Keep Calm, Teach On (An Everyday Survival Kit for Teachers)
Template ID# 86179
       Spa Day Bucket (For any woman needing a break from her everyday life)
Template ID# 56431